Sunday 5 May 2013

Southern Sunday & dry grocery rants :)

While the idiot box ranted of why 'it's high time for Chennai Super Kings to reflect on their strategy' ... my mind was ranting on a different level. Far from the high octane IPL score table;  I was thinking South Indian food. Crazy what a cricket match could do!

The Turbanator ranted on... unaware this viewer had quietly slipped into a deep food coma at the other end of the globe. Chenai was washed by the Mumbai Indians (Noooo!!!) My man KD, being the Marathi Manus rejoiced at the other end of the room. He wasn't even looking at the TV screen... he was indeed shaving. Blades on his face and mind elsewhere. He was doing CRICKET in his mind. Dark comedy that is. Crazy what a cricket match could do!

While I grasped at the skewed comedy going under this roof: He quips-  'Kuch Meetha Ho Jaye...?' mouthing the words of his favourite hero.

 'Well', said I, 'insensitive I must say. Dhoni's team just lost!!'

 And so he begins his analysis of why Chennai lost.. (shaving foam still intact on his chin- he can't give away this opportunity to discuss cricket)... It goes on and on till he realises that all this time he was only talking about why Chennai lost... never once did he mention as to why Mumbai won! Point to be noted my lord... that's because he never expected Chennai's defeat (Huh!) thereby implying that perhaps Mumbai won it by fluke. Sounds like desperate logic to soothe my faltering morale. Anyways, I declared to him,'You know I would have supported Bangalore if they were playing today. Chennai is my second fav'.. Yeah! he said..

..........................

Later that day, we did some serious un-messing and de-cluttering- much needed bout of Spring Cleaning. What transpired from the back drawers in the kitchen were packs of dry groceries; lovingly bought at some time and forgotten until today..

Emerges pasta, pasta.. noodles x 4 packs, peanuts, a variety of lentils. Lasagna, noodles and more pasta-ish packs. I wasn't impressed. How did I manage to shove this lot at the back of the drawer. (In my mind I am thinking: when we have our own place; there will be no room for hollow drawers in the new house. Every nook and corner of every shelf and drawers will be visible- No more unloved packs of dry groceries! Implies either glass shelves or perhaps no shelves/drawers (huh, scary thoughts now; the mind being on its own trip!)). For now though, I am on the top of my grocery list  for the next few weeks at least.

Keeping such ethics alive... I turn my attention to this pack of coarse semolina (Sooji). 'This is such a good start,' I thought. Southern food after a match between Chennai and Mumbai! Lunch was sorted: this pack of Sooji would be lovingly restored to a delicious South Indian dish: Upma and a Coconut Chutney to go with it. The dilemma however, was that I had only dried desiccated coconut in the same drawer. So here it is, Coconut chutney with a twist... something I haven't dared to try before. Nevertheless 'Necessity is definitely the mother of invention'...


Recipe:

For the Upma:
Semolina/Sooji: 2 cups
Carrot (diced, finely) 1/2 cup
Fine beans (diced, finely)
Onion 1 (diced)
Ginger, grated 1 inch
Green chillies 2, chopped
Oil 1 tbsp
Ghee 1/2 tsp
Curry leaves 4-5
1/4 tsp mustard seeds
1/2 tbsp Channa Dal
1/2 tsp Urad Dal
Lemon juice 2 tbsp
Peanuts 10-12
Raisins 10-12
Salt to season

Coconut Chutney:
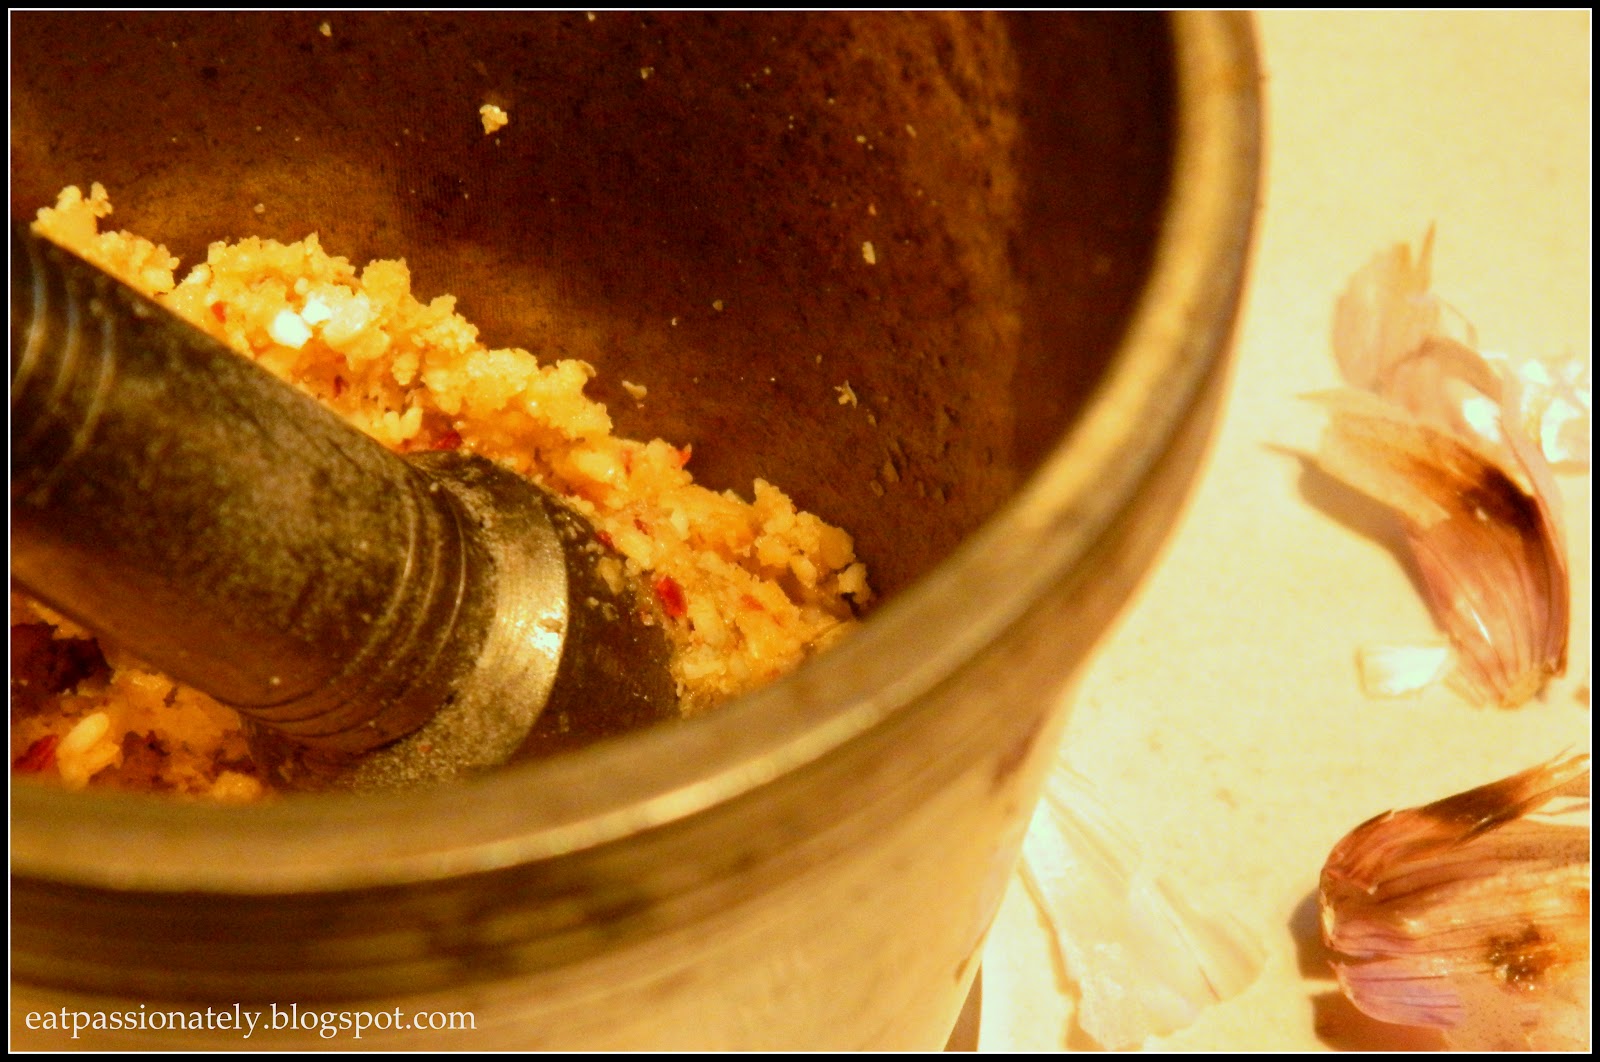
To blend together- Desiccated dry coconut 1 cup, 1/2 tbsp dry roasted Chana Dal; Ginger 1/2 inch, Green chillies 2.
Soak everything in about 5 tbsp water for about 15 minutes and then wet grind. Adjust water to get a nice consistency-- not pasty; I like mine to be a little coarse, light and fluffy.

To temper the chutney: Heat 1 tsp oil. Add 1/4 tsp mustard seeds, 3-4 curry leaves, 1 red chili and a pinch of hing or asafetida. Once the mustard seeds splutter; pour this gently over the coconut chutney. Mix and set aside. Season with salt as per your taste and mix well before serving.


Coming back to the Upma: The method we'd use is the same as a creaming method. No wonder, the more post name for Upma is apparently 'Cream of semolina' (courtesy Goggle search). For now though posh-ness is not the thing playing in my mind. Taste should be a check rather than poncy inedible daffodil on top of my Upma!

Here's the way I did my Upma:

  • In a wide mouth skillet, dry roast the Sooji. Do this on medium heat. This process is to seal the flavours and amazingly this process will up the health meter: Dry roasted things absorb less oil than tossing them directly to oil. This is true of Sooji for sure. Once you get this nice aroma and the grans are golden in colour- shift to a dish or something. 
  • In the same skillet, heat the oil. Add in the mustard seeds and let them splutter. Next up, reduce the heat and toss in the peanuts, urad dal and chana dal. Make sure you toss them around... when everything has got this nice crunch and colour to it; add in the curry leaves, onion and green chilies. 
  • Stir and add the fresh vegetables. Tip in about 4 cups of water. I usually use twice the amount of water to Sooji. Once the water's come to a boil, reduce the heat to minimum and add in the toasted Sooji. Mix well. For a creamy consistency: always use low heat in this process and mix well. If you find the dish to be getting dry; sprinkle water. But do take care to ensure there are no lumps. Remove from heat once the Sooji grains are all done. Add in salt to taste and mix again. Adding salt at the end to any dish will ensure moisture. 
  • To serve add a dash of lemon juice. Voila! you have it... from the dark dingy corners of the drawers- Sooji transformed to this Southern beauty :)


..... Keep those mind rants going (IPL or otherwise).... & enjoy this one. Such a labour of a multitasking mind :)

Sunday 28 April 2013

Bread Pakora


A little treat from street food passionate India: the humble Bread Pakora.  This dish is fast food Indian style and is filled with all the joys of eating on the go. Whether street food per se is a healthy option; is something that I leave to the conjurers of street food to decide. But who can resist the sensation of aroma filled streets, the hustle and bustle around and of course the ways of the street food is unique. I wonder if it can ever be replicated within the environments of one’s kitchen. A trip to the lanes of Old Delhi or Khao Galli in Mumbai is a must for anyone who wants to experience India’s craze with street food.

This recipe today is not one of my inventions. It is a recreation of something that reminds me of all those lovely things on the streets in Mumbai. Just that today the bread pakoras will be subjected to a more controlled environment and I have decided to go healthy way. Rather than deep frying them, I have used a griddled pan- the outcome isn’t bad at all. Infact K loved it. So here comes the recipe with step by step demonstration. Enjoy!

Bread Pakora

Ingredients:
4 slices of sandwich bread (I have used white. Try upping the healthy eating meter by using whole grain or brown bread)
1 medium Boiled and mashed potatoes
2 tbsp Mint-coriander-green chilli chutney
4 slices of pepper
4 slices of tomatoes
2 cheese triangles (I used laughing cow brand – light)
Gram flour 5 tbsp
Caraway seeds/Ajwain ¼ tsp
Kashmiri chilli powder ¼ tsp
Salt to taste
Oil 1 tbsp
Chaat masala ½ tsp

Method:
Skin boiled potato and coarsely mash. Add a pinch of salt and keep aside.


Trim the bread and spread mint-coriander chutney on one and the cheese on the other. Top mash potatoes onto the one of the slices. Arrange two slices of yellow pepper and tomatoes. I use yellow pepper as they are sweeter than the green variety. They add a crunch to each bite and pairs well with the buttery potatoes and the acidity of the tomatoes. Top it up with the other slice of bread. Using a sharp knife halve the sandwich.


In a large bowl- tip in the gram flour. Add caraway/ajwain seeds, chilli powder. Adding a little water at a time make a smooth paste. The consistency should be enough to coat the bread. Using a little water at a time helps in checking the thickness of the batter. Mix well and once done add salt to taste. Mix again.

Heat a griddle pan. Tip in a little oil. Dip the sandwich bread into the gram flour batter coating all sides and gently lower them on to the pan. Once placed on the hot griddle, do not move the bread – we want the bread surface to have the griddled effect. It’s the same technique one would use to griddle cook meat or fish. I cooked my bread on medium heat and it took me about 2 ½- 3 mins to get that effect. Once a sides done, flip it gently and do the same.


Once done, I had these gorgeous griddled effect and really crispy too. You can deep fry these bread pakoras as well: but then why not try this way and check out if it stands true on your taste test?
I had a remaining un-battered bread sandwich and I simply griddle cooked it- without any oil. Didn't taste bad at all. Felt more like a toasted sandwich. Perhaps more healthier than the bread pakora version; however, it lacked the depth of the former.

To serve sprinkle chat masala and more mint chutney. 


Thursday 7 June 2012

Mixed fruit preserve


12 Large Strawberries
20 Cherries, pitted
2 Pear
2 ½ cup  Sugar or ¾ of fruit weight
4 tbsp.    Lemon juice

Tip in the fruits into a not metallic mixing bowl. Add in about 4 tablespoon sugar. Use your fingers to mash everything up. Cover with cling film and rest (in the refrigerator of course) through the night.

Sterilize all the utensils you’ll be using. The wooden spatula, whisk, canning jars, spoon all goes into a large stockpot with boiling water. Leave them there for about 10 minutes. Remove carefully and dry in and out.

In the meantime, set a large pot on medium heat. Tip the berries and the fruit mix. Once on a rolling boil, reduce heat to bare minimum and simmer for about 10 minutes. Next up, bring in the sugar. Stir it all in. Keeping the heat to just about simmer levels cook for an hour.  Last up: splash in the lemon juice and stir.


I use a whisk to blend in the pulp a little. However, this is optional. Now this is a really old-school recipe without added pectin. The end product will be a nice gooey preserve but not jelly like (rem’er there’s no added pectin). All we want is a nice sticky consistency that just about holds on to some bread, muffin or scones. To check if you have the right consistency a simple trick is to chill a spoon or a bowl. Tip in a teaspoon of the preserve onto it and see if it loosely sets on the cold surface. If you like what you see; you’ve got it. 

Transfer from heat and cool before spooning the preserve to sterilised pots. I usually store these jewelled pots for 6-8 months and therefore opt for a hot bath; which is again a simple process: all you do is tightly screw the lids and emerge the cans into a pot full of simmering water. Leave it for about 10 minutes. Transfer, cool and refrigerate.

Voila, your home made preserve is all ready to be relished. 


Friday 23 March 2012

Srikhand mousse: Ushering in the Maharashtrian New Year (Ghudi Parwa)


Srikhand mousse: Ushering in the Maharashtrian New Year (Ghudi Parwa)

It’s that time of the year, when you wake up to the chirpings of the little birdies. Yes, the change of season is profound after that spell of winter. Of all the seasons though, none as magical as spring itself!

Spring indeed is special and all across India; different regions have devised their own ingenious way of heralding this season; but, all with the sole anticipation of prosperity, abundance and exuberance as depicted by nature herself.

The recipe for today is just dedicated to the arrival of spring. It’s based on the classic Maharashtrian sweet Shrikhand, but with a twist and I call it Shrikhand mousse. Unlike the traditional dish, this one is different given that we are cooking the yoghurt- like in Shrikhand Wari but not setting it as a fudge. To be honest, with all the thoughts put together to creating something slightly different from the traditional and yet keeping up with the flavours that comes with it; I wasn’t a bit disappointed with the finished dish. Infact, I was in love with the texture, having hit the yoghurt with some mild heat and somehow, I guess the heat added to the creaminess and accentuated the nutty flavours.

I really do hope you all try it out; and once again: A happy Gudhi Parwa to my loved ones! 


Ingredients:
Hung curd/yoghurt                         2 cups
Sugar                                                2 cups (adjust to taste)
Almond powder                              3 tbsp
Cashew nut powder                         2 tbsp
Saffron                                              10 strands, soaked in 2 tbsp warm milk
Cardamom powder                          1 tsp
Whole almonds                                4, lightly toasted, minced
Pistachio                                           4, lightly toasted and finely minced
Candied Carabao Mango                 10 slivers, finely minced
Rose water                                        1 tbsp


Method:

This recipe is all about the yogurt. Get the yoghurt right; and it basically takes care of the taste and flavour quotient. I am going for natural Greek Yoghurt. In case you can’t lay your hands on the Greek variety, choose a variety which is creamy (the smoothening part can be handled with simple whisk). Tip this into a kitchen towel-gather all the four corners and tie up a knot. So, there’s your yoghurt in a pouch. The whole point in doing this is to take out as much water contents from the yoghurt. What I do next is quite a bit of an experiment (especially if you are doing this for the 1st time). But then, we don’t fret… impossible is nothing Ladies and Girlies. Place this pouch in a large sieve or cauldron; place something heavy on the top of the pouch for that extra pressure and tip it into the fridge (overnight is best; if not at least 6 hours). Remember to place something underneath that cauldron to collect the water… I love making a drink out of that. But that’s for latter.

6 hours up, unwrap the yoghurt parcel… that lump of yoghurt is the real thing. By the way, this process is essentially what hung yoghurt is all about. Neat eh?


 Tip this into a large non metallic mixing bowl and whisk, until smooth and creamy. Add in the sugar and mix again

Heat a heavy bottom, non-stick pan. You’ll also need a wooden spatula. On medium heat, pour in the yoghurt and stir. This will further evaporate any moisture, will dissolve the sugar and you’ll have almost silky textured yoghurt. Remember to reduce the heat to bare minimum once the yoghurt hit the pan and keep stirring for about 5-7 minutes. Add to that, all of the cashew nut powder (or fine mince), half of the pistachios, candied mango slivers and almonds along with the all of the saffron and the cardamom powder. Stir and take it off the heat. While it's cooling, I still stir and then finally I sprinkle in some rose water.

 Give it all a nice mix again. We are done. Spoon this luscious loveliness into  individual shot glasses and refrigirate. Serve chilled with a little sprinkling of the remaining dry fruits.

  All done, it’s time to relish the little spring in a shot glass. Sit back, relax and enjoy the season J


……………. Maverick Cook J


Monday 19 March 2012

Pork with white sesame and spring Greens


Pork with white sesame and spring greens 
Simple yet bursting with flavour, this pork dish is an indulgence in a very good way. Coupled with the goodness of sesame and greens, this pork dish is easy, delicious and very much comforting.

It was on of those days, marked by cravings of something familiar; something that invokes bonding. Me and my family… scattered around this earth like tiny islands-separated by geography and yet all belonging to the same. No matter how far we drift; essentially we are all but a part of our very own archipelago.

In memory of some of the best times with my loved ones; particularly my siblings, I am cherishing one of the dishes we’d often lick our fingers on (particularly on those drives along NH47: Guwahati - Shillong Highway).

Talking about the source of this recipe; I have to admit- preparing it was like a trip down memory lane. Nestled somewhere between Guwahati (Assam) and Shillong (Meghalaya) is this tiny eating joint. No billboards... for all that it is: it's a tiny place with a big take on flavours. To reach this foodie sanctum, you need to climb up a mini hillock, tackle the stairs and endure a shabby room (whitewashed with blue green lime based paint; light with a couple of queer 60 volt bulbs and a few benches and tables). I gather, the eatery was a necessity and a brilliant local venture; hosting hungry truck drivers criss-crossing the entire North-East of India via the NH47 highway. It had no name, and rightly so: the truck drivers and their assistants (handymen, as they are known) doesn’t need that frill). It’s the food they are there for and they are from all across the nation. (Some of my friends would have to eat their words when they land in this eatery: food from the North-East is not a matter of acquired taste). 

Dad discovered this place back in the early 70’s. He had just started his logistics and warehousing business-one of the very few ‘local lads’ in the business. As he tells us now… dealing with trucks and inter-state freight wasn’t an easy task. I think he went ‘native’… perpetually living a dual life: one as an urban middle class lad raving to make a good living for himself and a nomadic young entrepreneur living and travelling like the truck drivers themselves and sometimes with them. While on his trips, he would meet up with drivers and middlemen in such queer places all along the highway and ate what they eat. He tells us that food for truck drivers is a big deal and rightly so; they’d have to drive the beast for hours together, sometimes passing areas without a house or a shop (forget about eating joints). Therefore, any place where they could rest up, lie down, and eat to their heart’s content would be like an oasis reckoning thirsty travellers. And yes, no small portions in the original dhaba culture.

Fast-forward to some 25 years latter, my brother re-discovered that place. Just a little hint from my brother did it to remind my dad of that place. Must have brought back so many memories for him. It seems the place hasn’t change much: just that it was now run by the original owner’s nephew wife. They have kept it in the family! On the other hand; dad has moved over from the freight business; yet, I think he has retained some things from those days: He owns a restaurant now and calls it Dhaba… and he has stuck to what he thinks a dhaba should be J

As for us siblings: visiting that place is like going back and re-living a little of dad’s youth. My brother calls the owner ‘Mami’ and so do we. Here’s to dad and my siblings: I know I can’t do the real thing; yet just a try. 

So, yes this is a cheat's recipe. I have been thinking hard on trying to recreate the dish. In my own little way of course. Pork with sesame and spring greens:  Originally made with paste of sesame seeds and mustard greens (lai xaak); I have conveniently adapted to substitute the latter with spring greens. However, if you can manage the real thing-don’t hold back. With so few ingredients and without the oil; this dish is a taste test of the ingredients per se; so make sure they are nice and fresh. 


Ingredients
Pork, cut into 1.5 inch cubes 1 kg
Spring green                           ½ kg (since I couldn’t find mustard green)
White sesame seeds               5 tablespoon
Onion                                      1 large
Garlic cloves (with skin on)   2
Garlic paste                             1 tsp
Ginger, grated                        2 tsp
Red chilli flakes                      ½ tsp (or adjust)
Rice flour                                1 tbsp mixed with 3 tbsp water
Salt to taste

Method:

Soak 3 tbsp sesame seeds in water.

In the meantime, dry roast the 2 garlic cloves with skin on, remaining sesame seeds and red chilli flakes for a couple of minutes. The garlic should be roasted from within. Let it cool and make a coarse paste of the same. Marinate the pork pieces with this rub and a bit of salt for ½ hour.

Blend together the soaked sesame seeds, onion and garlic to make a somewhat smooth paste.


On a flat skillet, dry braise the pork pieces and keep them warm. This gives the dish a smoky flavour.


Into a wok, tip in the braised pork chunks, onion and sesame paste and sauté n high heat until the onions paste looses its rawness. Cover and cook for 20 minutes on low heat. Keep stirring in between. If it gets too dry sprinkle a little water. 

Now add the spring green (you are better off using mustard green or lai xak) and the rice flour (with the added water); mix well. Add the grated ginger. Cover and cook for another 10 minutes. Uncover and reduce the sauce to your liking. Taste and season. Serve immediately with plain rice or noodles.


(Aaita’s) Aloo chop


(Aaita’s) Aloo chop
Vegetable croquette stuffed with a boiled egg!

I owe this one to Aaita (maternal grandma)… she was a real conjurer in the kitchen. Aware that as a child I’d run a mile away from anything green or orange; she devised quite a few ingenious means to make me eat all things that didn’t quite fit my ‘can eat list’. I think my parent’s had given up on that front. But Aaita: she was relentless and more often then not I ate whatever she dished out (the greens, orange bits et al).

Vivid as if it were just yesterday are memories of her fantastic chops. She did a variety of them but the one that I really fancied and I still do (I mean literally) were her aloo chops. 

True I loved potatoes (wasn't a big fan of boiled eggs-omelettes were Ok; but absolutely loathed the leaves, carrot, green beans; just to name a few) yet, as a child this one was pretty mystery.… I mean I always knew she’d put in the abhorrent greens and orange things in there … but then the boiled egg: how did it ever get there? 

Yes, she made a veggie croquette with a boiled egg inside! And I ate it… not because I’d started life afresh with a super liking for the things in it (particularly the then unmentionable ones) (I wasn't even concerned); but all for the excitement of seeing an egg in the middle of that mash! I think she named it ‘magic cutlet’ or something. And I trusted her. 


…. Some  20 odd years latter ; an urge took over me today; to prepare something that invokes her ever presence around me. Her ‘magic cutlet’ ...... it was going to be. With a friend arriving for tea in just about a couple of hours, I needed to get going.


Things that I need:
Potatoes               3 medium
Eggs                     2
Green beans        50 gms (finely chopped)
Carrot                   50 gms (minced)
Ginger                  ½ tsp (grated)
Garlic                   1 tsp (minced)
Spring Onion       2 tbsp (finely chopped)
Fresh coriander   1 tbsp (finely chopped)
Mint leaves          2, finely chopped
Bread crumbs      6 tbsp
Salt and pepper   to season
Garam masala     ½ tsp
Plain flour            2 tbsp, mixed well with 50 ml water
Plain flour            1 tbsp for dusting the eggs
Oil                        2 tsp
Non-stick flat pan

Method:
Wash and scrub the potatoes. Keep their skin on and boil in a large pot of water. Cook until they are cooked inside-out. Immediately drain water (keeping them soaked in water will make the mash go soggy) and once cool, peel skin off. Keep aside

At the same time, lower the eggs into a pot of salted water and boil them for around 8 minutes. They should be well done. Once boiled, drain and run cold water on the eggs. De-shell and keep aside.

In a bowl, make a mix of the plain flour and water. Spread the bread crumbs on a platter. Keep handy a little flour to dust the eggs. Keep these aside for the time being.

Heat a little vegetable oil and slightly sweat the mince vegetables (French beans and carrots); tip them into a large mixing bowl. To that, grate the boiled potatoes. Add salt, pepper, garam masala, fresh coriander, mint leaves and amalgamate well.

Dust the boiled eggs with a little flour. This will help the veggie mash to stick onto it.

Take about 40 gm of the potato-veggie mix. Shape it like a disk using your palms. Place the boiled egg in the centre of the disk and work with your hands to envelope the egg with this mash. As an when you need more mash, go ahead and add it in. Work with your palms and fingers to get an even ball shaped croquette. Repeat the same with the other egg. Just make sure that there are no cracks on the surface of the croquette.

Now lower the croquettes into the plain flour water mix… quickly dabble it in that and then roll them in the bread crumbs.

Heat 1 tsp oil in a non-stick flat pan/skillet and roast the croquettes. Roll it around the pan carefully to get an even golden brown tinge.

Done! Serve immediately. Great as a tea time snack.


And just a thought
...Aaita never lies and she did things nobody else could do with food! I am glad I did this one today… J

Friday 16 March 2012

Mushroom with Parma Ham


Cooking midnight mushrooms: a state I love being in. But literally speaking I do genuinely love the real thing as well. Endlessly versatile, mushrooms comes in many sizes, hues, textures and flavours. It's something like a sponge-add it to whatever you like and it soaks up the flavours. I have never known anything savoury that doesn't go with it... besides, what mushrooms lends to a dish is it's wholesome nutrients and earthy tones (both in texture and flavour). 

For this dish out here, I have kept it to basics. Just going for a roast of mushroom with some firm tomatoes and adding a bit of Parma ham at the end. Goes well with just about anything: I served mine with some buttery garlic bread. 

Mushroom with Parma Ham

Ingredients
Closed cup mushroom                                  300 gms
Parma ham                                                    8 strips
Firm raw tomatoes, medium/small  8
Basil (dried)                                                    1 tbsp
Olive oil                                                          1 tbsp
Salt                                                                  to taste
Dried red chilli flakes                                    ¼ tsp
Balsamic vinegar                                           2 tbsp
Garlic, minced                                               1 ½ tbsp

Method
Clean and pat dry the mushrooms.
In a mixing bowl, tip in the balsamic vinegar, olive oil, basil (dried), minced garlic, salt and chilli flakes. Mix well to amalgamate the ingredients.

Tip in the mushrooms and the tomatoes into a large bowl and drizzle the the marinade you just prepared. Give it all a nice mix.

Preheat oven to 200 degree C.

Transfer the mushroom (stem side up) and the tomatoes to a large roasting dish. Do not over crowd. Ensure everything fits in a layer. Roast for 10 minutes.

Tear the Parma ham into bits or strips. Scatter them on to the mushrooms; allowing a piece for each mushroom. Roast for another 10 minutes.

Serve immediately. I am serving mine with some bread to mop everything up J


]]]]]]]]]]]]]]]] Maverick cook :)